Blade Runner
NoodleBar
As I am trying to work as a professional Concept Artist would for this unit, I chose a section from the Blade Runner screen play. For this scene I used a description from the screenplay that describes the scene as the main character Deckard waits to be seated by the noodle bar.

Initial Sketch done on procreate, did not feel that this was something I wanted to develop further as I felt that creating this in 3D was more beneficial
Rough plan

The 3D model of the location took three days to generate on Blender software using a variety of modelling techniques, but I felt it needed to be completed in 3D so that I could select the best angle, zoom and focus of the bar and final positioning of Deckard within the scene to give it the right mood and atmosphere.

The lighting of the location needed to be carefully considered, so I used Blender’s cycles rendering engine to create a dimly lit scene to then position the noodle bar suitably. I have decided that this scene takes place within a crossroads with towering skyscrapers above, I felt that the best way to create a dynamic sense of lighting within the scene was to use neon lights as well as street lights over busy pedestrian streets.
Cityscape

Reading through the screenplay I wanted to give the impression of the buildings being oppressive and looming over the city and the inhabitants. Creating this cityscape took around two days with a lot of it being based on the modelling of individual skyscrapers and making each one look unique. I created the base for this piece on World Creator putting a small lake within the centre I feel that this would be a good starting point as it wasn’t too detailed but it gave some sort of depth to the city itself, so you could feel a sense of scale with the buildings.

After speaking to an industry professional I was advised that it is only necessary to create what is needed for the shot. After learning this I realised that it wasn’t entirely necessary for me to overpopulate the entire city, as a lot of the buildings will be out of shot and this meant that I could even reuse some of the structures I’d already created and just approach them from a different angle, so some could be reused. This saved me time as I didn’t need to create a complete three-dimensional city but only enough for it to look populated and real from the viewpoint from which I had chosen.


Spinner
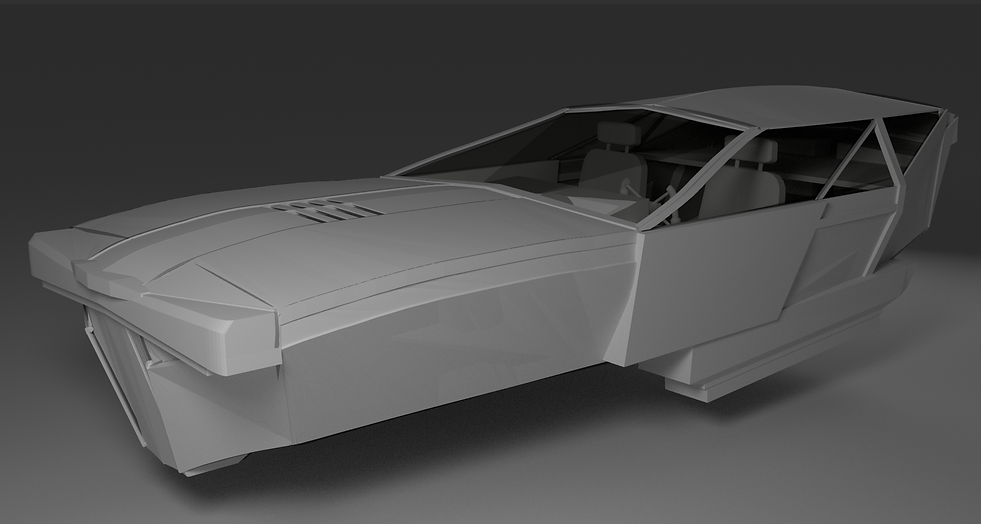
For the spinner (flying car), I decided that I would further experiment with the grease pencil to begin to understand how I could use this to create 3D forms and structures as I had already done this previously with a fighter jet in my experimentation. My first attempt did not go according to plan,
as I had overworked the sketch and found it difficult to pull out detail and create a convincing design. From this I decided to start anew and create a fresh version, using what I had learnt from the previous attempt.


Rough plan

The second version was much more fluid in its design as I could consider and learn from my previous mistakes. After using the grease pencil to create structure I added details to the model itself using normal modelling techniques that are used in Blender to add variety of objects such as a steering wheel, seats, front bumpers and engines for the back of the vehicle. I then coloured this and I added luminosity for lights and interiors to make it feel like it was more realistic.


I felt I achieved a lot more with this model as there was detail both within its interior and in its exterior, this was something I had not attempted to do before this point.

Final outcome
Deckard

Quick Sketch for an idea of Deckard's Silhouette


![noodle 1bar ev] .png](https://static.wixstatic.com/media/2dd275_8bc1c613135949dcb16ae36fe68a909a~mv2.png/v1/fill/w_484,h_261,al_c,q_85,usm_0.66_1.00_0.01,enc_avif,quality_auto/noodle%201bar%20ev%5D%20.png)


Shoulder of Orion
For the last piece created around the Blade Runner theme I looked at the final death scene monologue of the Rutger Hauer character replicant Roy Batty. Within this he describes off world events he has experienced in his short lifespan. From this I visited one the described locations on a piece of software called Space Engine which I was able to generate imagery from for the visuals he described. One such location was “off the shoulder of Orion,” from this I captured an image over a planetary body located near to the star Betelgeuse (the red star which is Orion’s shoulder), to then use as reference within my artwork.


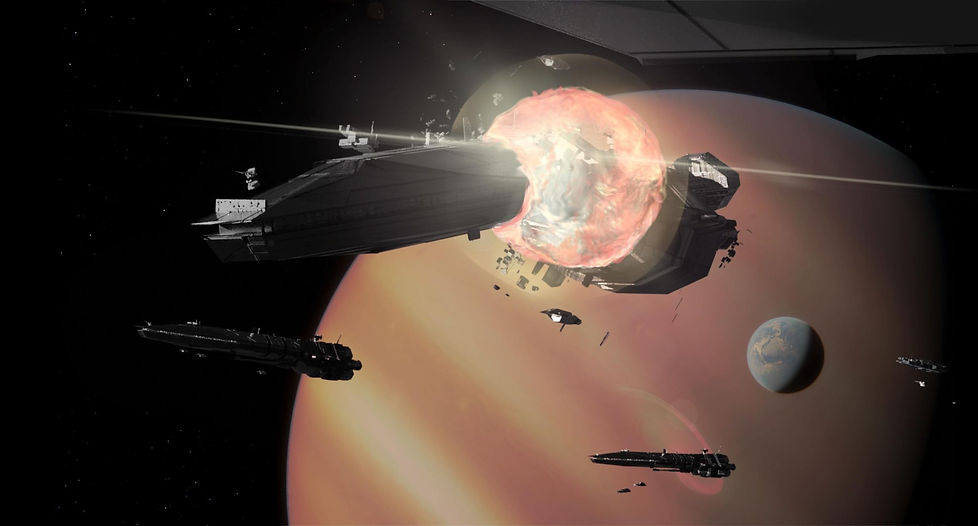
For the “attack ships on fire,” I decided that I needed to model these described within the scene so I used greeble details placing them onto a larger model to create a large sense of scale to the ships as these tiny details made the objects look much larger in proportion. I also played around with the composition of these ships within the scene to try and capture a more dynamic and cinematic angle.


It was important to me to illustrate the fire in space correctly so I researched how fire burns within a vacuum so I could create a realistic representation of the fire coming from the ship out into the vacuum of space. There have been various investigations around how fire burns within a vacuum and most of these demonstrate that fire burns within a spherical sort of form.

fire orb within a vaccum
